Animation retargeting is the process of transferring animations intended for one character onto another.
The skeleton structures and their proportions may differ.
Retargeting allows you to use the same set of animations on different characters.
In this article we will retarget motion capture animations
created by the Motion Capture Center of the ACCA (The Advanced Computing Center for the Arts and Design), the
Ohio State University:
http://accad.osu.edu/research/mocap/mocap_data.htm.
From the presented on the page we use one of the following sets of animations in BVH format:
Female 1, Male 1, Male 2.
The target character is Izzy from Reallusion.
Character is available for download at Unity Asset Store https://www.assetstore.unity3d.com/en/#!/content/50690
.
We will use Autodesk MotionBuilder 2015 for retargeting
and iClone 3DXchange5 for auxiliary purposes.
Our goal is to show all the stages of the retargeting process, including mocap import and animation export to BVH.
We will also solve problems that will arise.
Steps
Notice!
To adjust the T-pose of any of the skeletons, you must remove the [ ] Characterize option from both characters.
-
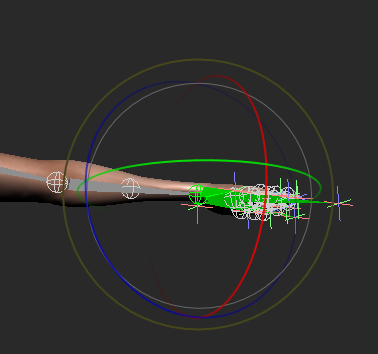
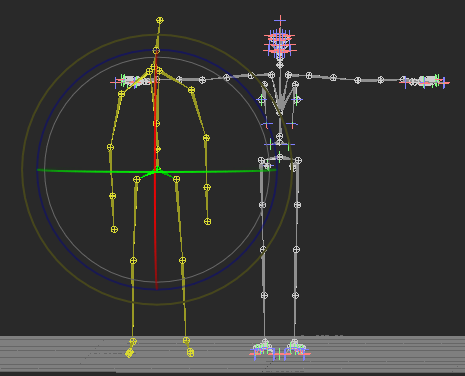
When you import the animations in MotionBuilder (we work with Male2_*.bvh),
you can see the following picture. You can correct this "skewness" problem by exporting the animations
from iClone 3DXchange to BVH with the "Reset bone offset" flag.
-
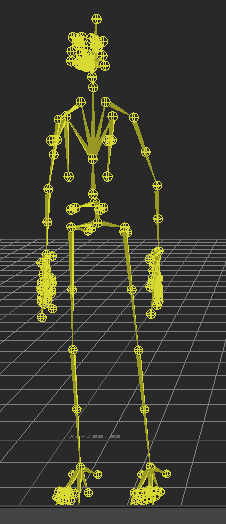
That's what we mean by "skewness" of Hips when importing Male2 animations into MotionBuilder:
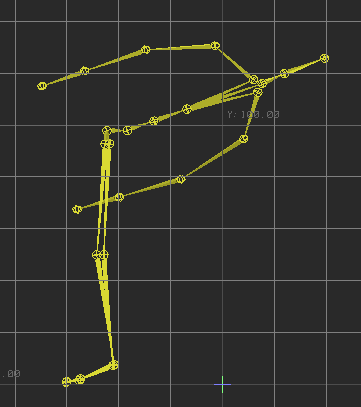
-
After the import to iClone 3DXchange the model is fine:
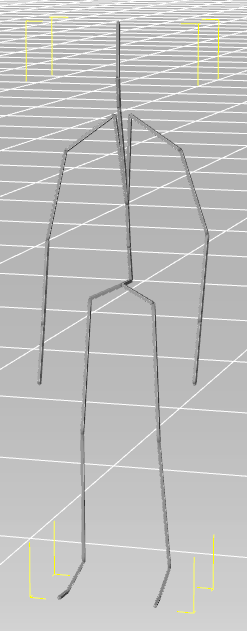
-
Drag-n-drop any of the Male2_*.bvh into iClone 3DXchange.
-
Then drag-n-drop all the rest animations you need into the Motion Library:
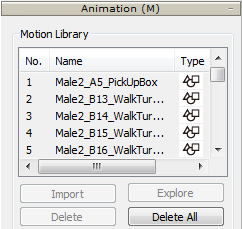
-
Press Add All to Perform.

-
Now we have all the animations in the Perform Editor section.

-
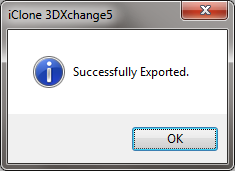
Export them. File -> Export to Other 3D Format -> Export BVH...
-
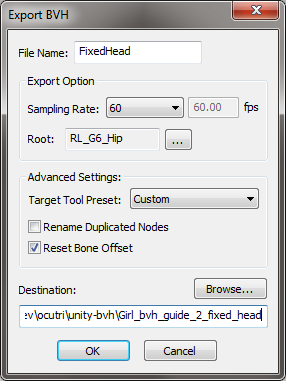
Set [x] Reset Bone Offset and press OK.
![Set [x] Reset Bone Offset and export the animations`](images/image14.png)
Note: “File Name” is a prefix. Also, this field cannot be empty.
-
Male2 animations are fixed:
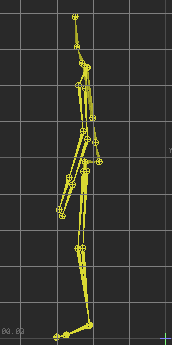
-
Now we can move on. Open Girl.fbx in MotionBuilder (you can download it at Unity Asset Store
https://www.assetstore.unity3d.com/en/#!/content/50690).
-
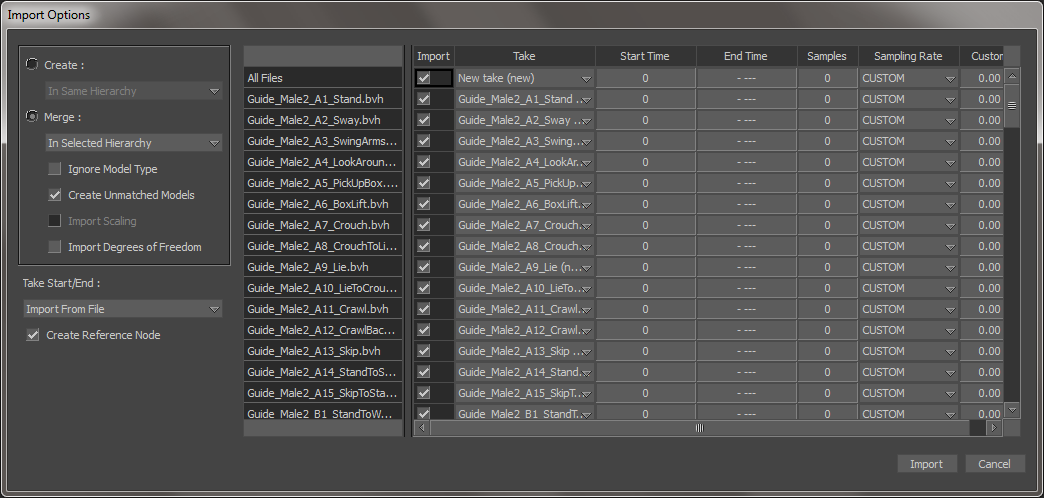
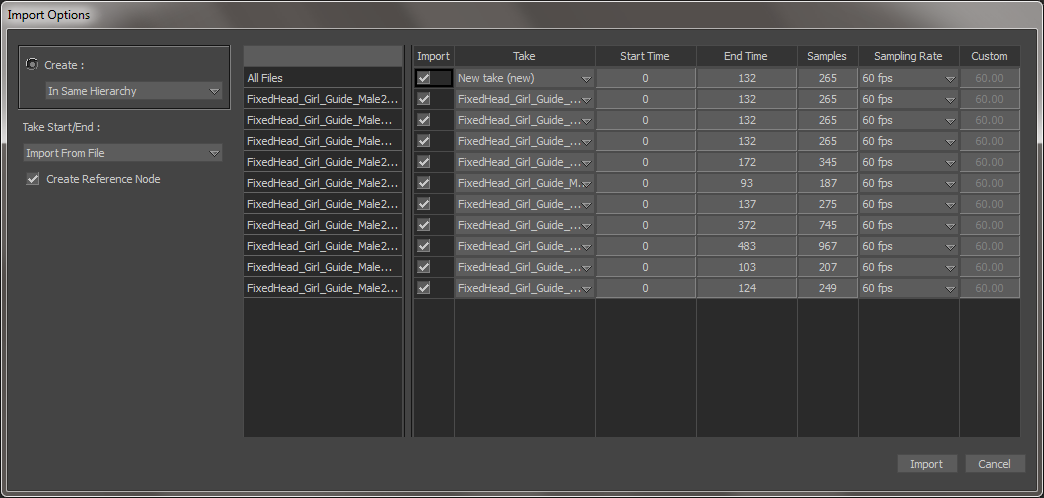
Click File -> Motion File Import…, choose any of the fixed *Male2_*.bvh, for example *Male2_A5_PickUpBox.bvh.
- Import Options:
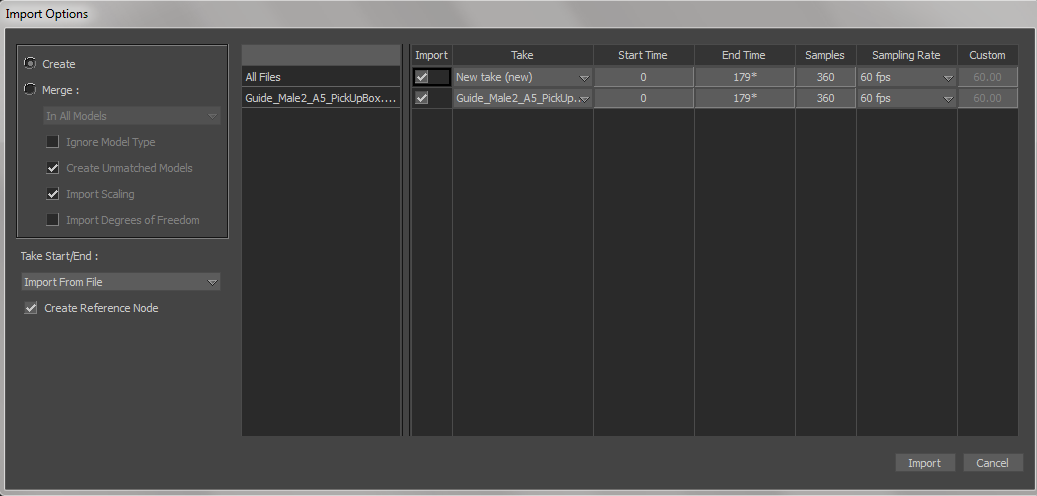
Note that we select Create (not Merge).
-
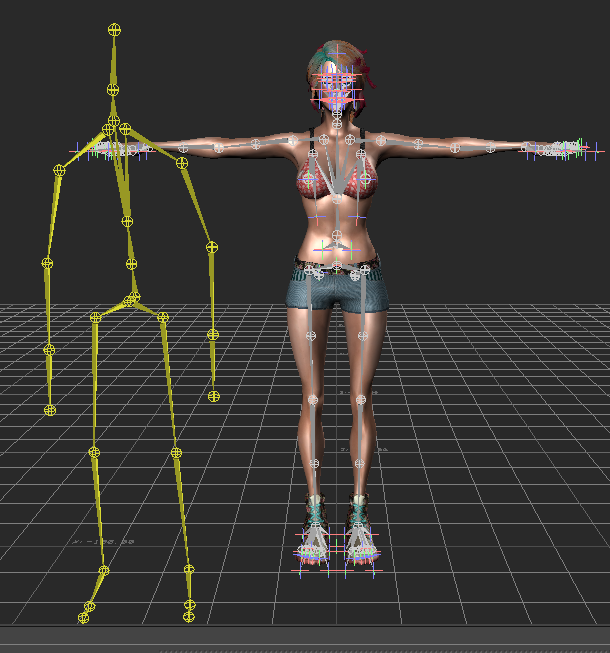
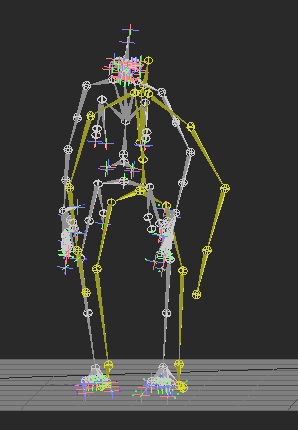
The scene looks like this:
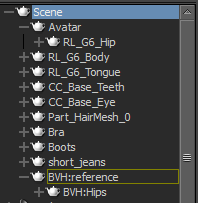
Avatar — reference Girl;
RL_G6_Hip — Girl root bone (Hips);
BVH:reference — Male2 reference;
BVH:Hips — Male2 root bone (Hips).
-
Select Asset Browser Templates / Characters / Character.
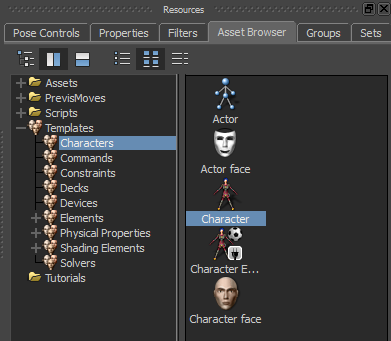
-
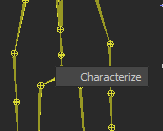
And drag-n-drop onto the Girl skeleton. The Characterize tooltip pops up. Click it.

Alternatively, you can drag-n-drop onto the Hips bone in the Navigator / Scene

-
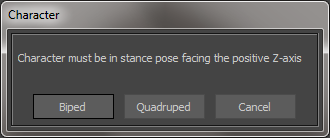
The following message pops up:
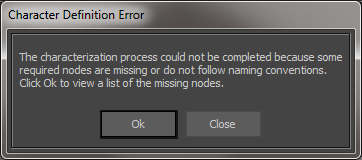
Press Ok.
-
One more message:
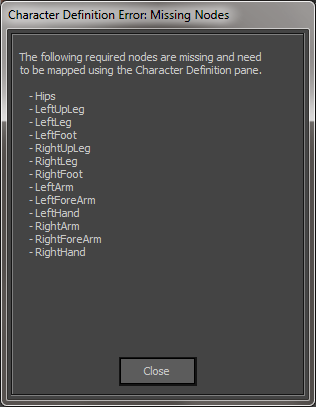
Press Close.
-
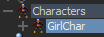
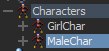
Rename the newly created character (Character)...

...to GirlChar.
-
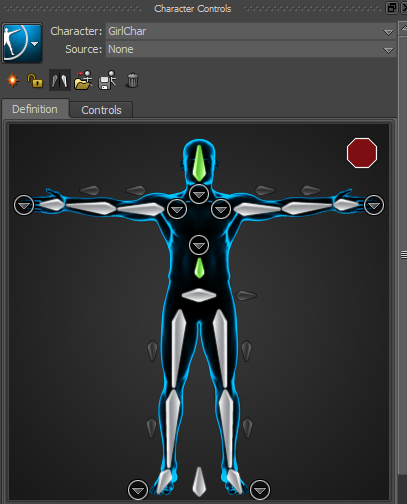
Double click on the GirlChar.
-
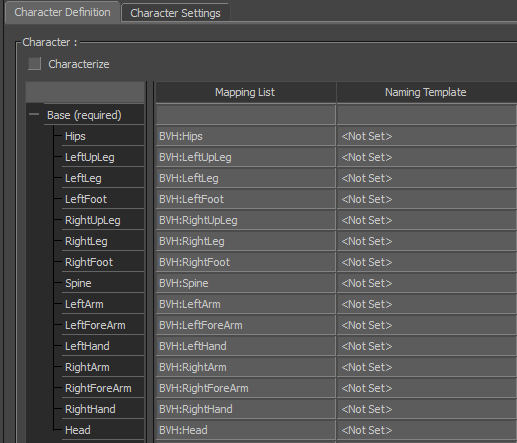
Make sure that Character: GirlChar is selected in Character Controls and the Definition tab is opened.
-
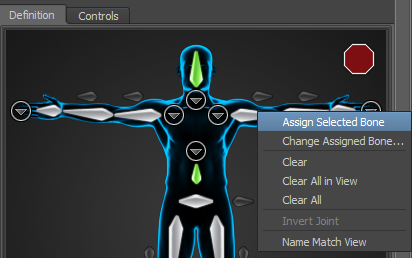
Now - the process of mapping the bones. LMB (click with the left mouse button) on the bone in the viewport:
-
RMB (right mouse button click) on the corresponding bone in Character Controls / Definition, Assign Selected Bone:
-
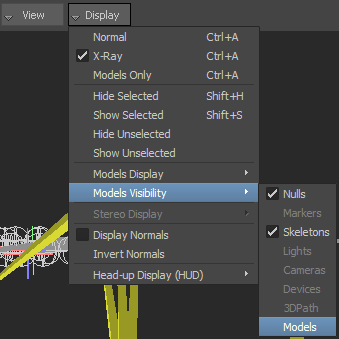
Hide the model:
-
A good sign is the correspondence the character bone names
and the internal representation in MotionBuilder:
-
Do not forget about smaller bones, such as Shoulder (Clavicle):
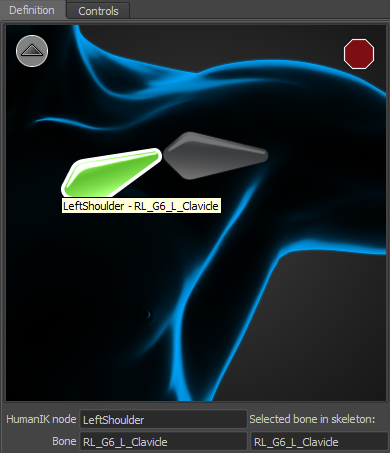
-
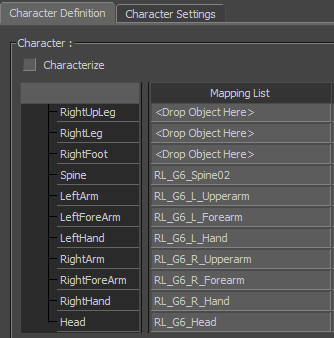
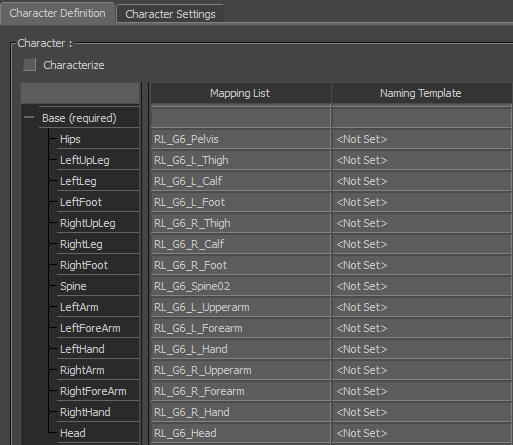
The minimal set to map is all the bones from the "Base (required)" group.
-
Now set Characterize.
-
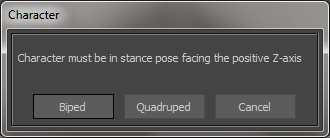
Select Biped:
-
Go to Male2. Drag Character onto Male2 skeleton:
Press Characterize.
- Select Biped:
-
Rename the newly created Character to MaleChar.
-
Male2 bone mapping is allright.
-
The thing is its current pose will be considered a T-pose.
-
Turn off [ ] Characterize from MaleChar.
-
Select BVH:Hips, RMB -> Select Branches.
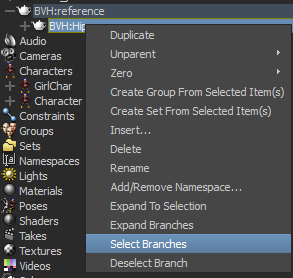
-
RMB -> Zero -> Rotation.
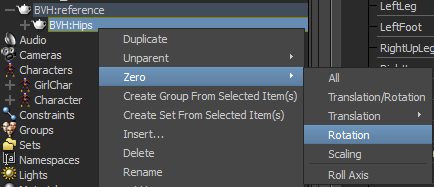
- Will get this:
-
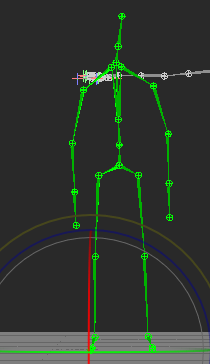
Now we need to turn this into a T-pose.
-
Rotate the bones with the MaleChar [ ] Characterize switched off until we are happy with the T-pose.
-
Turn on MaleChar [x] Characterize.
-
Turn on GirlChar [x] Characterize.
-
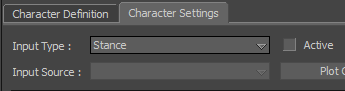
Open GirlChar Character Settings and select Input Type: Character, [x] Active; Input Source: MaleChar.
![GirlChar - select Input Type: Character, [x] Active; Input Source: MaleChar](images/image28.png)
-
Play the animation. Girl skeleton must reproduce the Male2 animation.
-
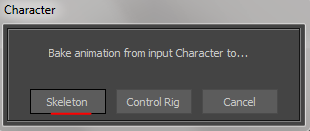
To "bake" the retargeted animation, press Plot Character.

-
Select Skeleton.

-
The default settings are fine.
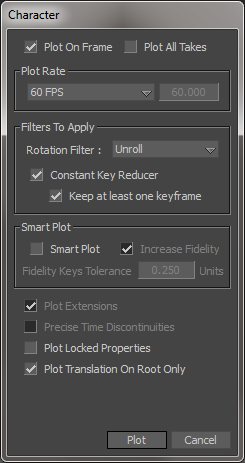
A detailed description of these parameters:
http://mocappys.com/retargeting-animation-motionbuilder/#Plot_Properties_Window_Explained
-
Check that the plotting was successful.
With these settings, the GirlChar character will keep the animation.
-
Select the Hips bone of the Girl character.
-
File -> Motion File Export…
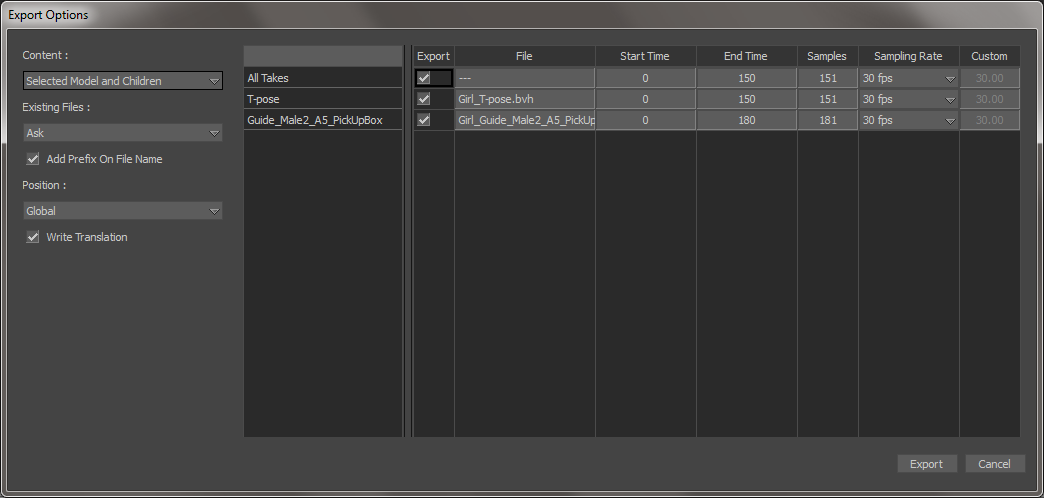
Make sure that "Content: Selected Models and Children" is selected.
-
The message pops up:
Press Yes (three times).
-
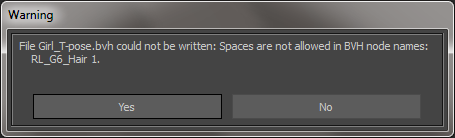
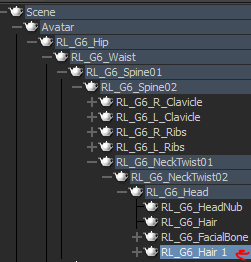
See the "RL_G6_Hair 1" bone:
-
Rename this bone to "RL_G6_Hair_1".
-
Select the Hips bone and press File -> Motion File Export.
-
The operation should be successful.
-
Open the exported BVH in iClone 3DXchange. Play the animation.

- It would seem that everything is fine.
- Let's check how MotionBuilder sees this BVH.
- Create an empty MotionBuilder project.
-
File -> Motion File Import. Import the newly created BVH.
-
Notice something wrong with the head pose.
-
The workaround is to export the BVH from iClone 3DXchange with the [x] Reset Bone Offset flag.
-
Export.
-
Rename the fixed BVH:
Everything is fine.
-
This is how we retargeted a single animation.
- Now let`s retarget multiple animations at once.
- Open our main scene with MaleChar and GirlChar.
- Select BVH:Hips.
-
File -> Motion File Import.
-
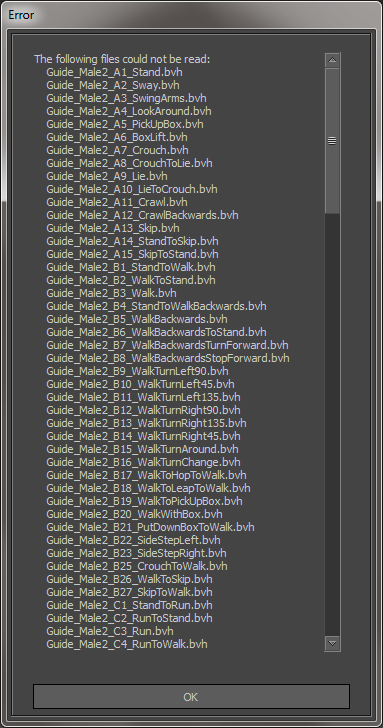
When importing a large number of animations, the following error may occur:
-
In this case, divide the original set into several parts and import them separately.
We are fine with two batches, approximately 75 animations each.
-
After you have finished importing all the necessary animations, select GirlChar and link it to the MaleChar:

-
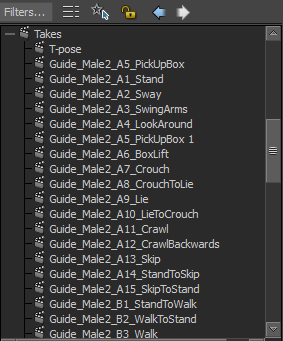
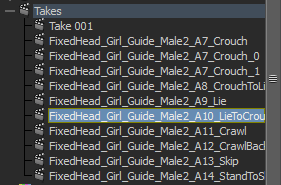
Double click the takes to start the playback of the corresponding animations
-
Next we call Plot Character on the GirlChar.

-
Select Skeleton:
-
Important checkbox to enable — [x] Plot All Takes.
![[x] Plot All Takes](images/image18.png)
-
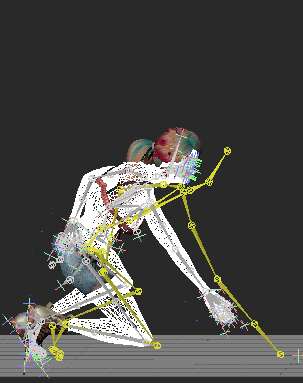
Check the retargeting quality by observing behaviour of the model.
-
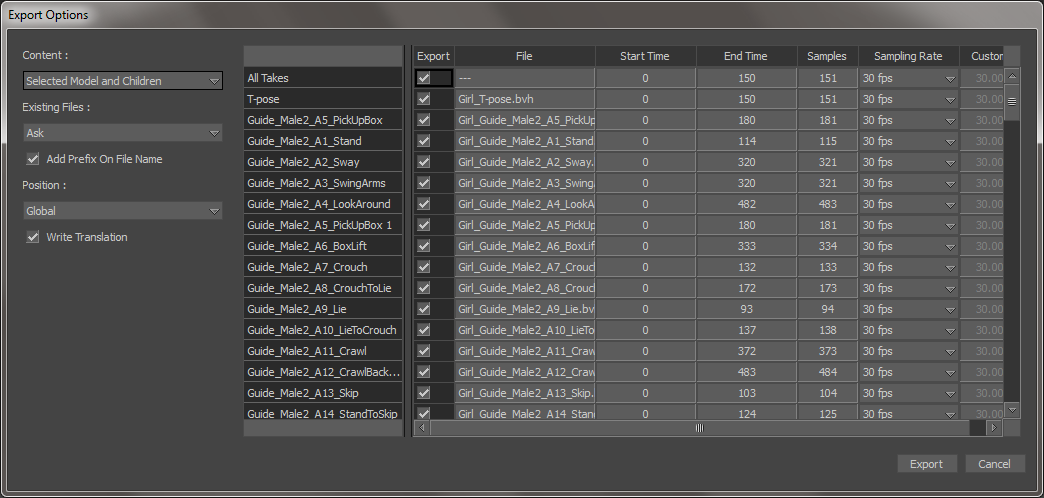
Select the root bone (Hips) of the Girl character and File -> Motion File Export.
-
As you might have guessed, the BVH animations been produced must be re-exported with iClone 3DXchange
and it`s [x] Reset Bone Offset flag on.
![the BVH animations been produced must be re-exported with iClone 3DXchange and it`s [x] Reset Bone Offset flag on](images/image23.png)
- Victory!
-
Now import those BVH animations into the empty MotionBuilder scene to check that they are fine:
-
Check all the animations (double click on the takes).
-
Now we can use these BVH animations to
train the deep neural network.
References
- http://mocappys.com/retargeting-animation-motionbuilder/#for_retargeting_Multiple_File
(this section in particular and the entire document as a whole)
- http://www.3dbuzz.com/forum/threads/186992-Multiple-bvh-s-in-MotionBuilder
Got questions? Contact us: